Belt Scales BW10 and BW20
The maintenance-free Belt Scales
We work with you to optimise the measurement of your bulk material conveyed on belts.
Place your request for a quotation now and we will be pleased to give you individual advice on your belt scale application.

Immediate advice: +49 (0) 29 61 – 96 56 86
Solvay GmbH
Mineral Baustoffe GmbH
Rheinkalk GmbH & Co KG
Südzucker AG
The added value to you
Simple
Easy to install in existing or new belt conveyors
Fast
Short delivery period
Safe
Integral transport and overload protection
Compact
Low total height and therefore ideal to retrofit in existing structures
Maintenance-free
No periodical maintenance work
Why is the belt scale the right choice for my plant?
With the benefit of our many years of experience we help you to select the right belt scale for your application.
Place your request for an offer now and we will be pleased to help you:
+49 (0) 29 61 – 96 56 86
You are probably familiar with the following situation:
You need reliable scale for your belt conveyor.
You want to record and monitor your material flow or load trucks with the correct weight.
The device should be maintenance-free, robust and offer good accuracy.
The ideal solution:
The BW 10/20 belt scales are the right tools for precise and maintenance free measurement of the material flow on belts.
Depending on the flow rate and the required accuracy, a type BW 10 or BW 20 belt scale can be used. Both types can be simply integrated into an existing or a planned belt.
Measuring ranges go from 500 kg/h to more than 10,000 t/h are available.
Upon request, we will gladly send you a series of information about our products, starting with the access to our data sheets.
How does the Belt Scale work?
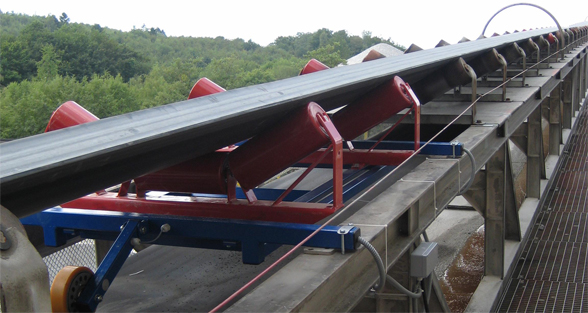
The BW 10/20 belt scales consists of a sturdy steel profile frame. Its flat, modular structure allows it to be integrated into almost every conveyor belt system. The precise stainless steel load cells are protected against shock loads by means of a mechanical overload stop. Periodic maintenance is unnecessary because of the specific, lubrication-free force transmission.
The product, transported along the belt, generates a pressure load on the idler(s). This is detected by the weigh frame and guided to one or more high-precision load cells. The weight signal from the load cell(s) is recorded and standardised by the electronic unit. The electronic unit multiplies the weight signal with the speed pulses of the belt conveyor – the result is a precise mass flow information.
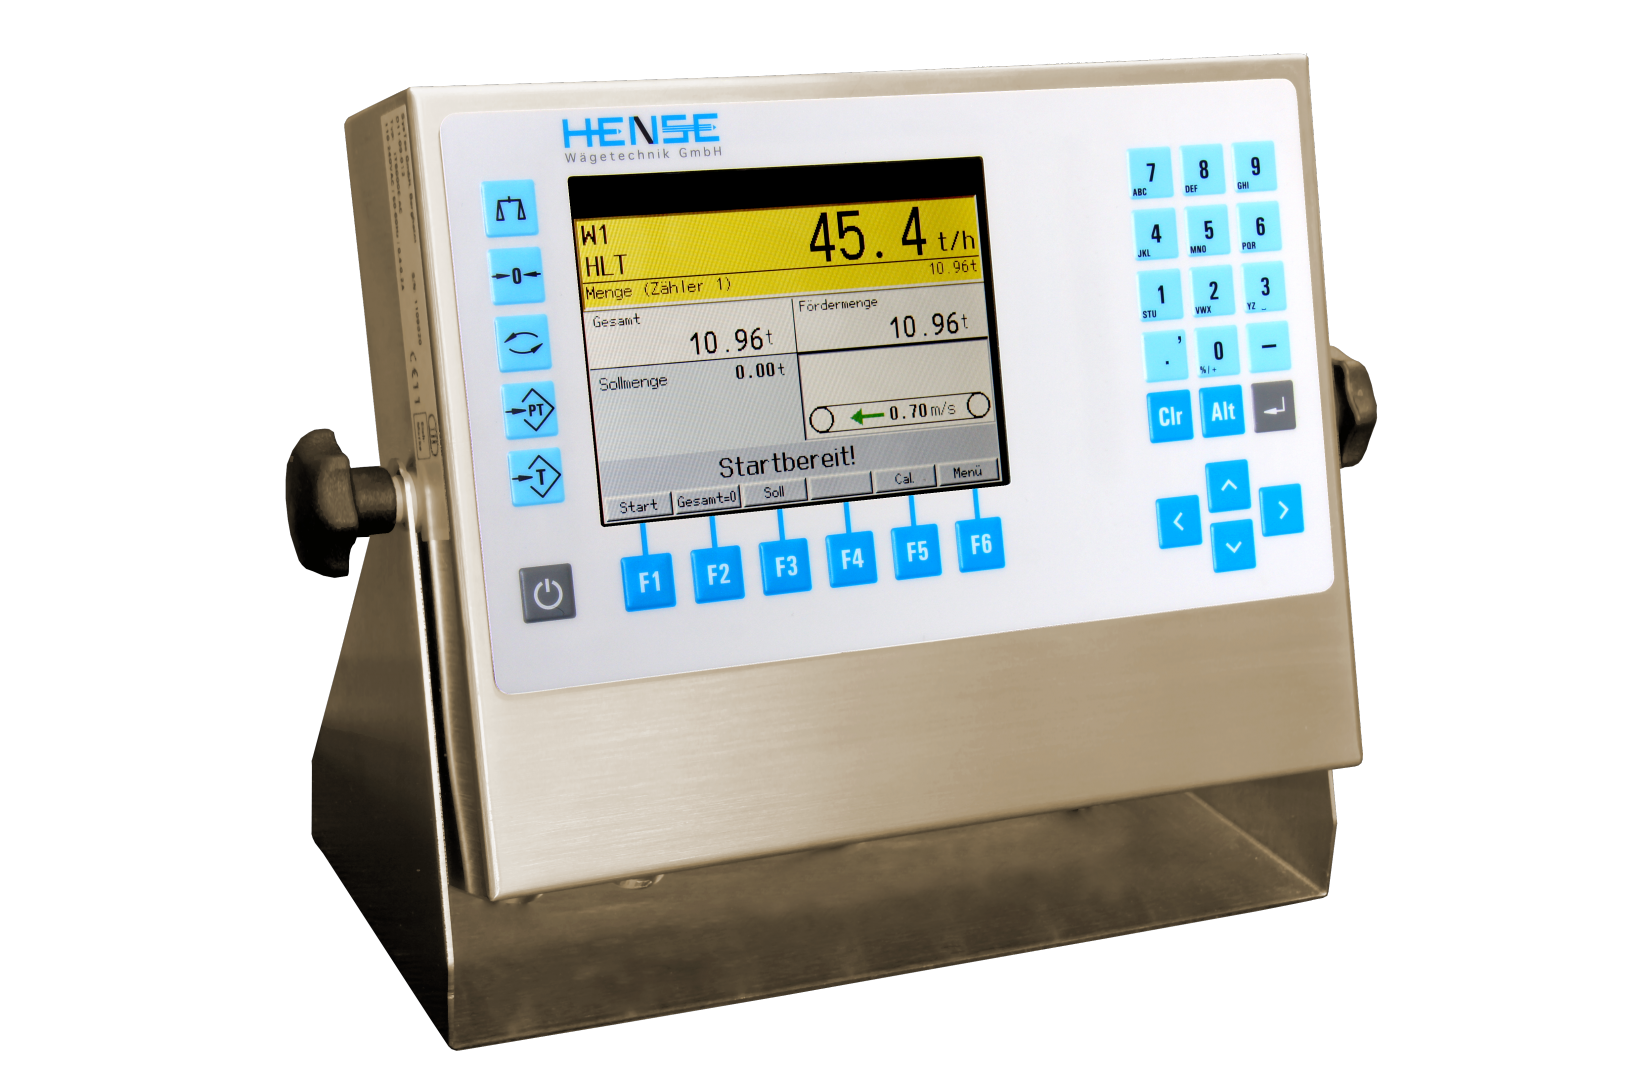
The flow signal (t/h) is „integrated“ over the time, so that the result provides the information about the absolute mass (t) conveyed. The conveyor speed is measured by a robust speed sensing wheel or a rotary encoder on the tail drum. The electronics system shows all the measurement data on the colour graphic monitor.
This information can be transmitted to the PLC system via different interfaces. Different counters are available to visualize the daily production rate or the batch size for truck loading. Many years of practical experience have enabled us to design simple and reliable belt scales at a very cost-effective price/performance ratio. The dual-idler Belt Scale offers improved measurement accuracy by reducing the influence of the conveyor belt. The BW20 is mainly use for low feed rates (below 50 t/h) and truck loading applications.

Sensor
Sensor type:
Full Bridge STRAIN GAUGE
Supply:
5 – 15 VDC
Combined error:
0.02%
Sensor protection class:
IP68
Sensor Material:
Stainless Steel
Weigh frame
Material:
Steel, powder-coated
(optional: Stainless Steel)
Overload protection:
3 times nominal load
Working Temperature Range:
-20°C to +60°C
System errors single idler Belt Scale:
typically 1 – 2%
System errors dual-idler Belt Scale:
typically 0.5 – 1%
Belt Scale Electronics
Display:
Colour graphic display
with kg/h, t/h, kg or t absolute
Supply:
110 – 240 VAC, 50 – 60 Hz,
12 – 30 VDC,
external battery
Input:
Full Bridge Strain Gauge Sensor/
inputs for taring & start batch, etc.
Output:
Counting Pulse per kg or t, 4 – 20 mA
Optional:
Profinet, Profibus DP, Modbus TCP, RS232/485, Wi-Fi, Bluetooth
Enclosure:
Stainless Steel
Type of protection:
IP67
Type of Mounting:
Wall or Panel mounting
Working temperature Range:
-10°C to + 40°C
Permits/certification:
CE, ETL …, ATEX (Zone 2/22)
Frequently asked questions
What levels of accuracy can be obtained with belt weighers?
Depending on application and boundary conditions, levels of accuracy of up to 99.9% are possible. The usual margins of error lie between 1 and 2.5%.
How can the accuracy of a belt weigher be improved?
The accuracy of a gravimetric (weight-loaded) belt weigher depends on many factors. The system errors for a belt weigher are nearly always caused by disturbance from the belt itself. The high level of accuracy of the electronics and the weighing frame can be disregarded in the calculation of the measurement error. In principle, they work with more precision, the greater the weight of the conveyed goods on the scale. Constant absolute error interferences thus have less effect on the weight. Crucial sources of error are the lateral „wandering“ / misalignment of the belt and the changing belt tension, e.g. as a consequence of exposure to the sun or weathering of the belt. Therefore, for belt weighers approved for certification, it is compulsory to have a tensioning station, but this can also ensure more precise measurement in process applications. Furthermore, the following factors can produce greater accuracy: The belt should be as new as possible without carriers or reinforcers, with gradient up to 20% (10% for Class 1 approved scales), max. 30° troughing (20° for Class 1 approved scales), tracking of the belt to avoid misalignment, a sufficient distance to inlet and outlet, no side scrapers / guides near the scales. The product weight on the scale can also be increased by reducing the transport speed. However, this is possible only up to a certain loading of the belt.
What are approved belt weighers?
In technical terms approved belt weighers are not especially different from „normal“ scales. However, components approved for certification are used and the scale has to undergo a test at a notified body (for instance the German national metrology institute, the PTB or Physikalisch Technische Bundesanstalt). In addition, once installed, the belt weigher must undergo a variety of test measurements at different transport speeds within the specified boundaries for the respective accuracy class.
The requirements for approved weighing systems are described in the European directive MID 2004/22/EG. According to this directive belt weighers are available in various accuracy classes. Belt weighers approved for certification are classified into different accuracy classes 0.5, I, and II. At the acceptance test the scale must not deviate by more than +/- 0.25% (accuracy class 0.5), +/- 0.5% (accuracy class I) or +/- 1.0% (accuracy class II) from the actual value at various transport speeds. The later operating margins of error lie within double error in the acceptance test, i.e. max. +/- 1% in accuracy class I.
What measuring ranges can be covered?
Belt weighers can be used for mass flows from 1 t/h. There is nearly no upper limit. For large belts the weigh frame must be reinforced accordingly, in order to bear the loads of the belt and the conveyed goods.
For what applications are belt weighers used?
Typical applications are balancing material flows, truck loading, process control, dosing and continuous precision mixing processes.
What are the requirements for maintenance?
The force is transmitted into the weighing cell by maintenance-free spring steel strips. Only the metering wheel with the non-contact proximity switch turns and therefore is subject to slight wear over the long term. For moist, clumping products, (brick clay, clay, etc.) we nevertheless recommend a periodic visual inspection, in order to remove heavy deposits, where necessary.
What are the main components of a belt weigher?
A belt weigher comprises the weigh frame, which by means of the integral load cell(s) determines the weight (in kg) of the conveyed goods being transported on the belt. The belt speed (in m/s) is also determined by means of a speed measuring wheel or a rotary encoder on the tail drum. From the two measurement values (the weight and the speed) the electronic encoder calculates the flow stream (in kg/h or t/h). In addition, the electronics system transmits the absolute quantity transported across the scale (in kg or t). All measurement values can be displayed on the electronics system or made available as an interface.
What interfaces are possible and what data is transmitted?
All state of the art interfaces, such as Profibus, Profinet, analogue outputs, impulse signals, Ethernet, serial RS232/485, etc. are available. Depending on the interface, the flow (kg/h or t/h), transported quantity (kg or t), meter readings, time and date, reference values, state and status of the measurement system are transmitted.
What are the limitations of the system?
In the case of very small mass flows, significantly below 1 t/h, precise measurement of the flow stream becomes difficult, by virtue of the small weight on the scale in proportion to the disturbances on the belt.
In which industries are belt weighers used?
The measuring principle is suitable for an extremely wide variety of products and therefore for nearly all sectors.
Are modifications in my plant necessary in order to install the system?
Built-in belt weighers can be easily integrated into new or existing conveyors. To do this one or more idlers are removed from the support frame of the conveyor and mounted or welded onto the weigh frame of the belt weigher. The scale is then positioned on the existing support frame and secured. The speed measuring wheel is secured to the scale and normally runs on the bottom chord. Alternatively, a rotary encoder is installed on the tail drum to measure the speed. The electronics system can be installed close to the belt weigher or at a greater distance in a control room.
Is calibration of the system necessary?
Yes, a belt weigher should always be calibrated with a known quantity of the conveyed goods. If it is not possible to calibrate with conveyed material, calibration with chains can be carried out. To do this, chains are laid over a relatively long distance on the belt and secured. The weight per metre of chain is used as a reference. In this way, both the belt speed and the current flow can be calculated and recorded in the electronics system. In practice a „genuine“ calibration is preferable to a chain calibration. The calibration with test weights on the weighing frame is only suitable as a function test but not as calibration of the whole system.
Many scales have a test device - what is this?
Many manufacturers offer scales with automatic calibration or a test device. In this system, a known weight is stored, manually or automatically, on the weigh frame of the belt weigher. However, this type of calibration is insufficient, since the major error interferences caused by the conveyor belt remain undetected. Therefore, this system is merely a device for testing whether the measuring chain on the belt weigher has stopped working. However, this can be detected simply and manually by applying a known or unknown weight.
HSH Wood Energy GmbH
Tartech Maschinenbau GmbH
Steag GmbH

